07. Dash Grid
Dash Grid
1. About this function
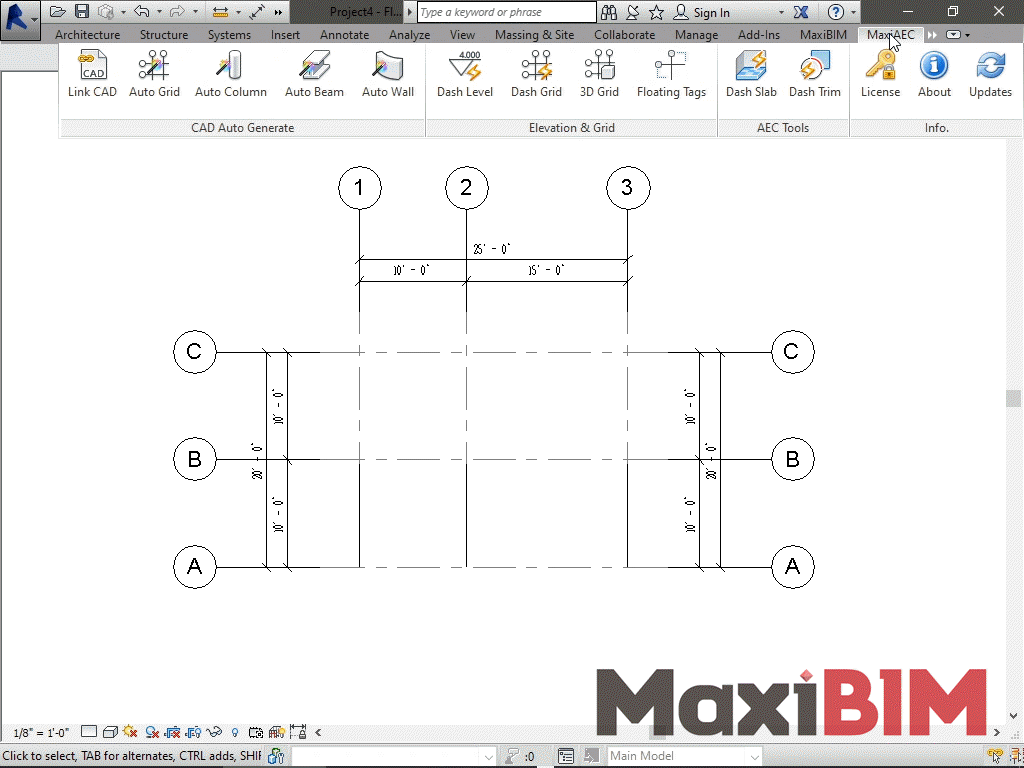
You can easily create a 3D section view only for the floor you're working on.

2. Demonstration
3. To use this function:
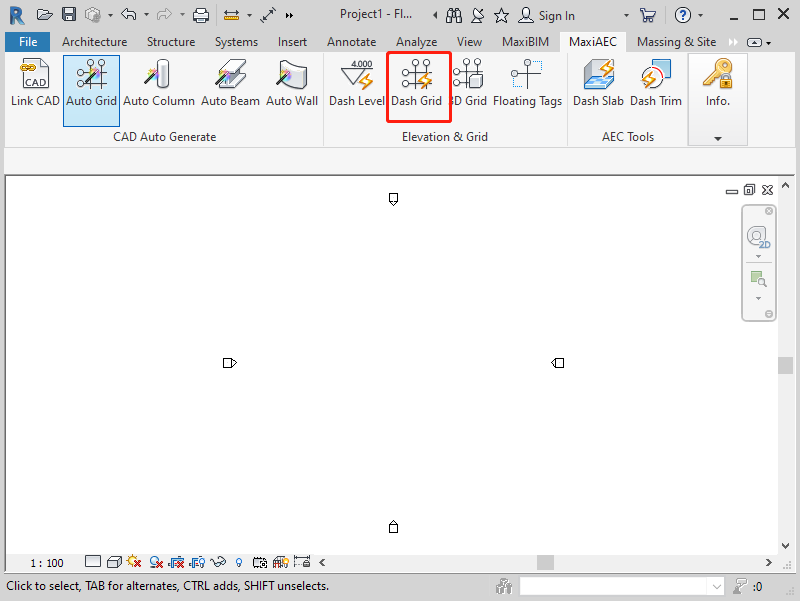
As an alternate to "Auto Grid" function, MaxiBIM provides this function for you to design your own grid system.
Click on the "Dashing Grid" button to activate the function. You can create either linear grid, or arc grid depending on your need.
You can manually design this Linear Grid system.
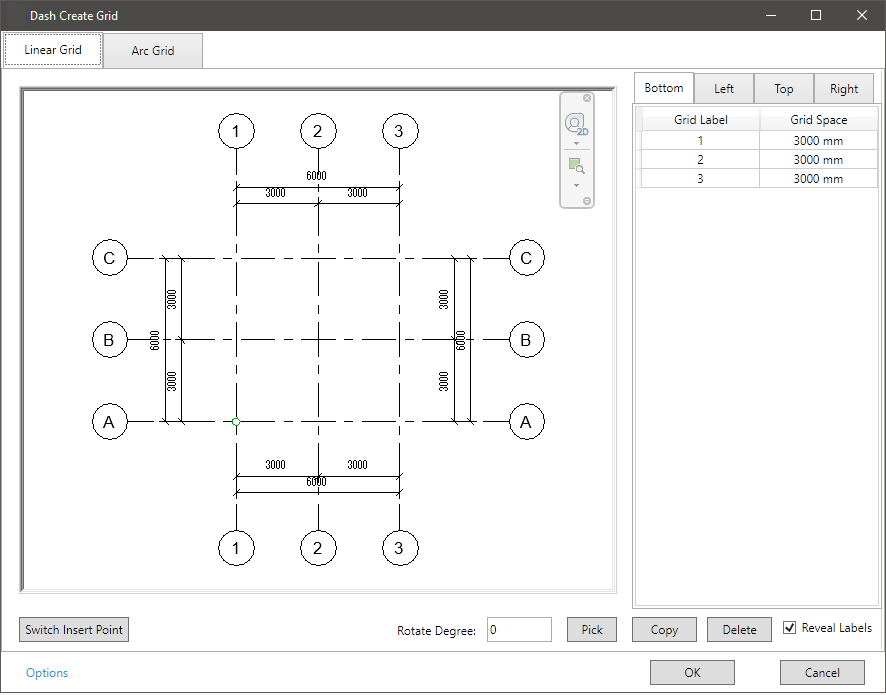
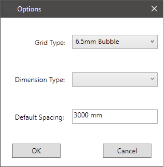
- Add grid lines and determine the spacing of grid by entering data into the table. Each Individual grid line and head can be add or removed by select the row and click "Copy" or "Delete".
- Also, change the dimensions in the table, and you can rotate the whole grids system by input a number for degree.
- You can preview the grids on your left hand side window to see if it suits your need.
- When you are happy with the dimensions of the grids, you can select an insert point and click "OK" to set them into your project. By default the insert point is located at the bottom left.
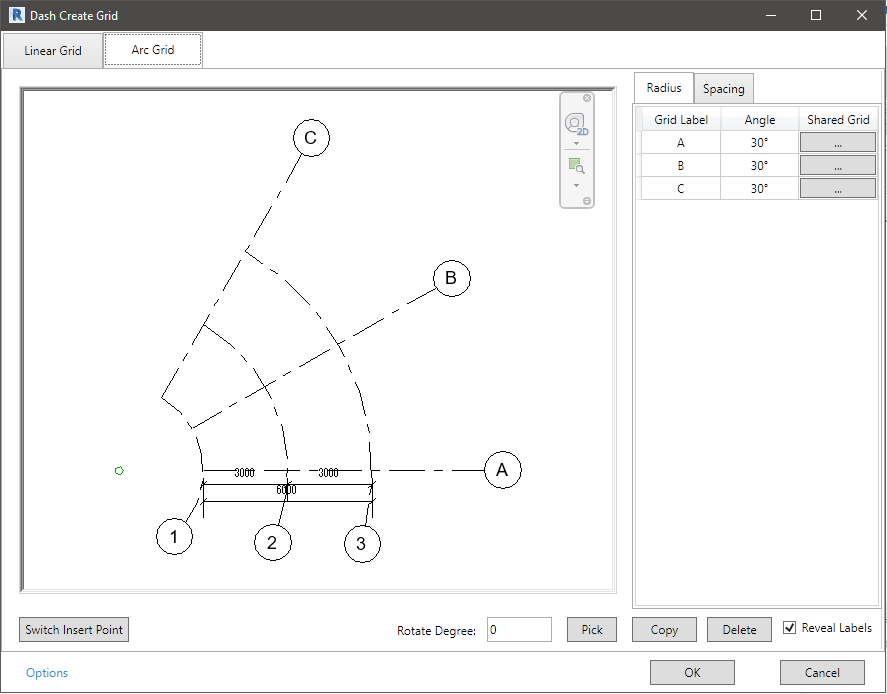
In Arc Grid Tab, you are offered with different set of parameters.
- In Radius, you can change the angle between each gridline. The total rotation should be less than 360°. You can also rotate the whole gridline system.
- Add new grid line by select row of grid and click "Copy", and use "Delete" to remove one.
- For Grid Bay Spacing, you can change the spacing between Grid Lines to set Inner Radius and Bay sizes.
When you are happy with the dimensions of the grid system, you can now consider where to insert them.
- If you are not planning to align the arc grids with any existing gridline, you can simply switch between Insert Point, and click "OK" to decide where to put them in the plan.
- If you want to connect these arc grids at the end of existing gridline, you can pick an existing grid in your model as a reference line.
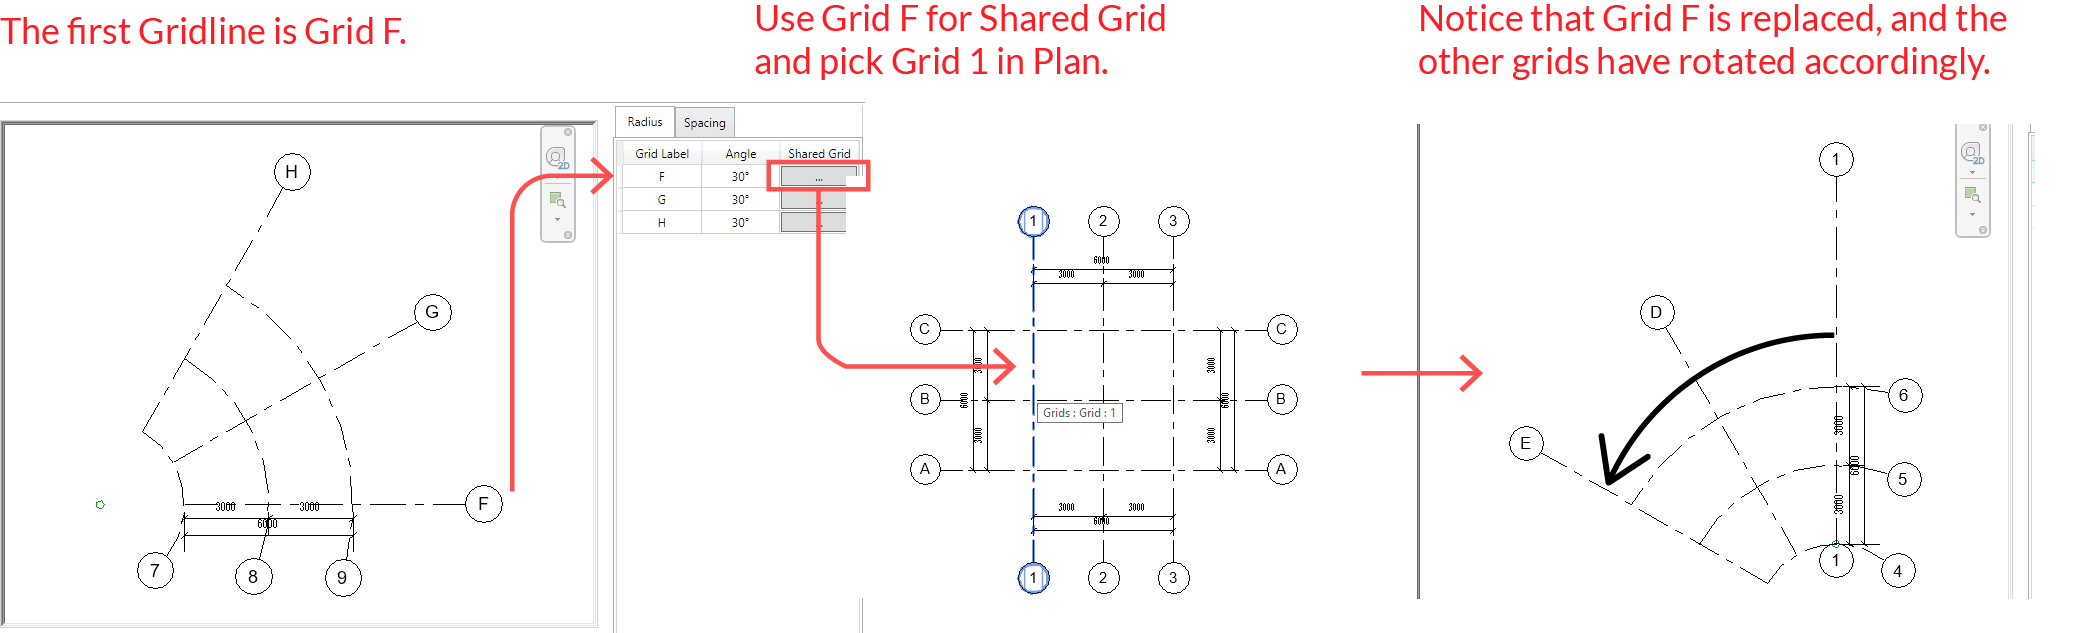
- First, decide which arc gridline you would want to replace with existing gridline, as a "Shared Grid".
- For that grid, click the button in "Shared Grid", and pick a gridline in plan.
- In the new preview window you will find that the arc gridline is replaced by the existing grid as a reference, and all other grids will rotate accordingly. You can once again edit the properties of these grids.
- Click "OK" to insert the arc grids in Plan. The insert plan is locked on the existing grid you have picked, but you can freely slide on that line for a location.
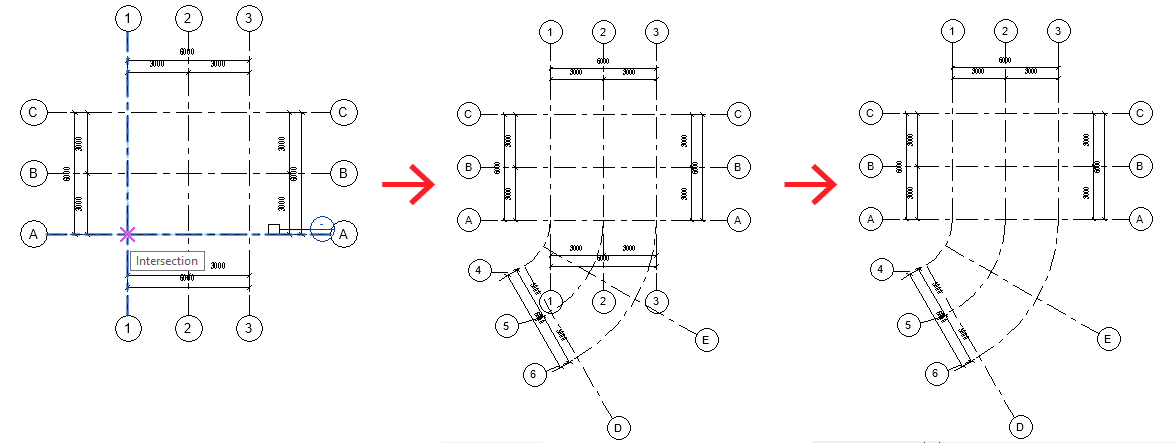
We suggest you to insert the arc grids on an intersection of grids, and remove any unwanted dimensions and annotations accordingly.
Related Topics:
Next Topic: Grid to 3D
Learn more about MaxiBIM common tools, which provides multiple gadgets for your everyday Revit tasks.